
Understanding user behavior in real-time can unlock significant potential for personalized experiences and optimized marketing campaigns. With Adobe Experience Manager (AEM) and Adobe Experience Platform (AEP), you can take control of your user data and leverage it effectively across various marketing channels. However, ensuring seamless data flow from AEM to AEP requires some setup. This guide will walk you through the steps needed to configure the Adobe Web SDK to transfer user data, like email addresses, from AEM to AEP.
By following this guide, you will gain the ability to unlock real-time user insights, enabling you to create more personalized user experiences. Ready to get started? Let’s dive in.
Prerequisites:
- Ensure that the user’s email address is accessible in the data layer object.
- Have access to AEP and AEP Data Collection products.
Step 1: Building the foundation - Creating schemas and datasets in AEP
Imagine a schema as a blueprint for your data. It defines the structure, ensuring everything is organized and easy to understand. In AEP, we'll create an "Experience Event" schema specifically designed to capture user email data.
Here's a quick walkthrough:
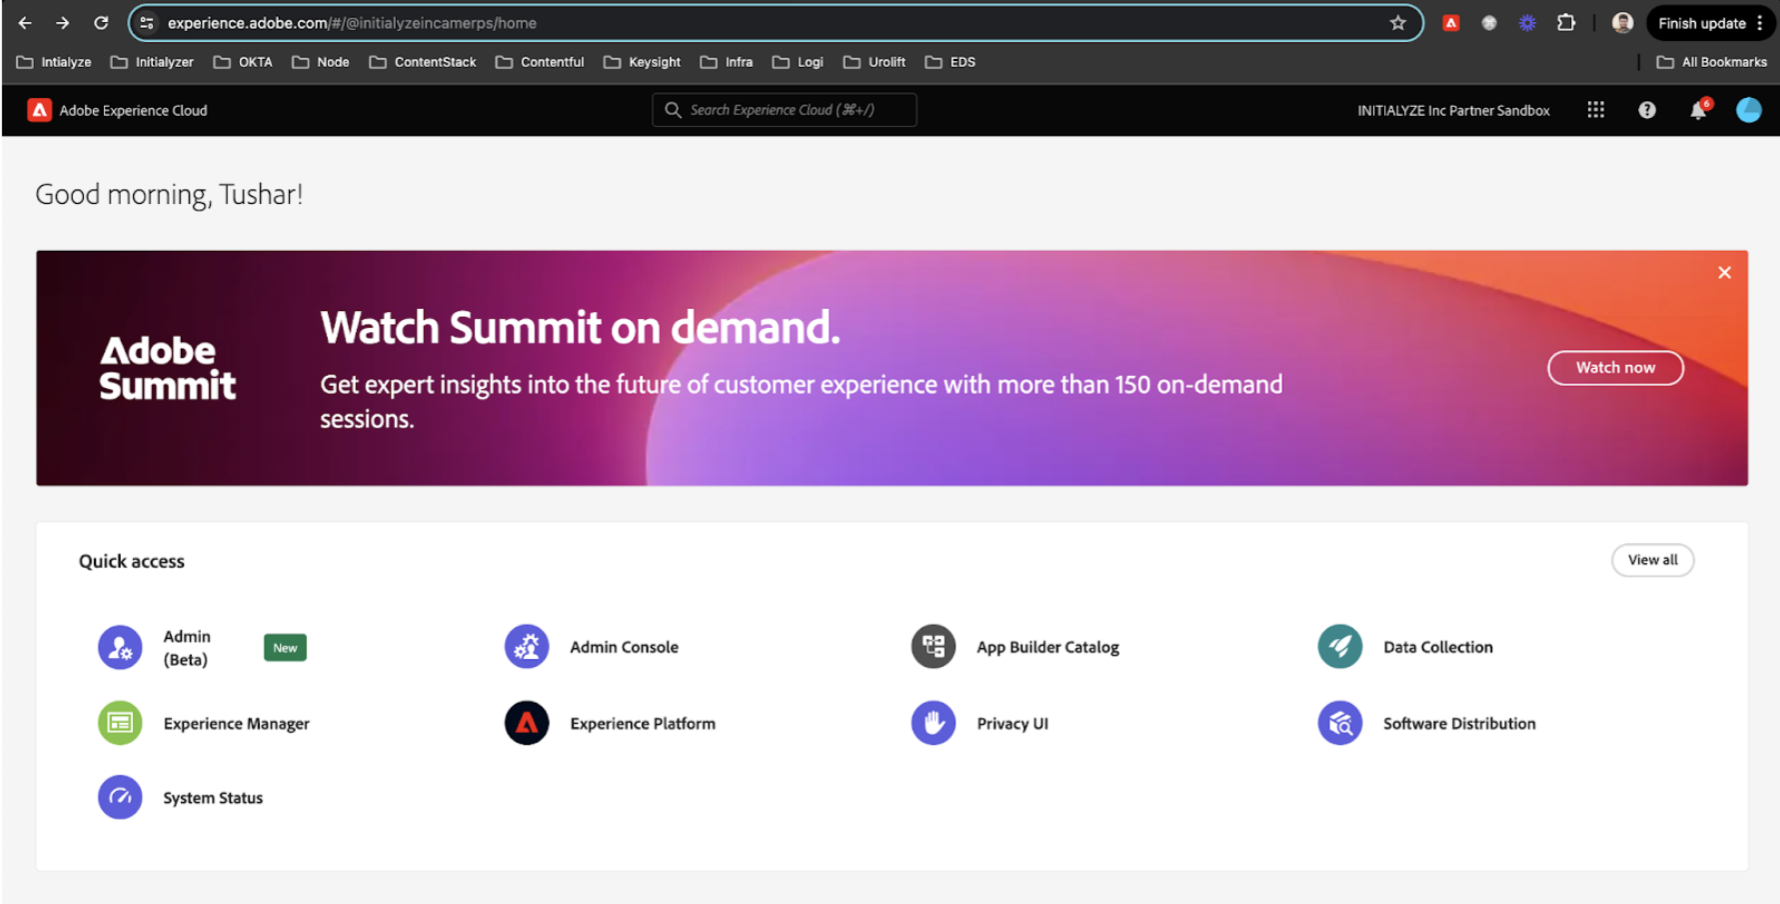
- Log in to AEP (https://experience.adobe.com/) and navigate to the AEP interface.
- Select your sandbox from the top right corner (think of a sandbox as a testing ground for your configurations).
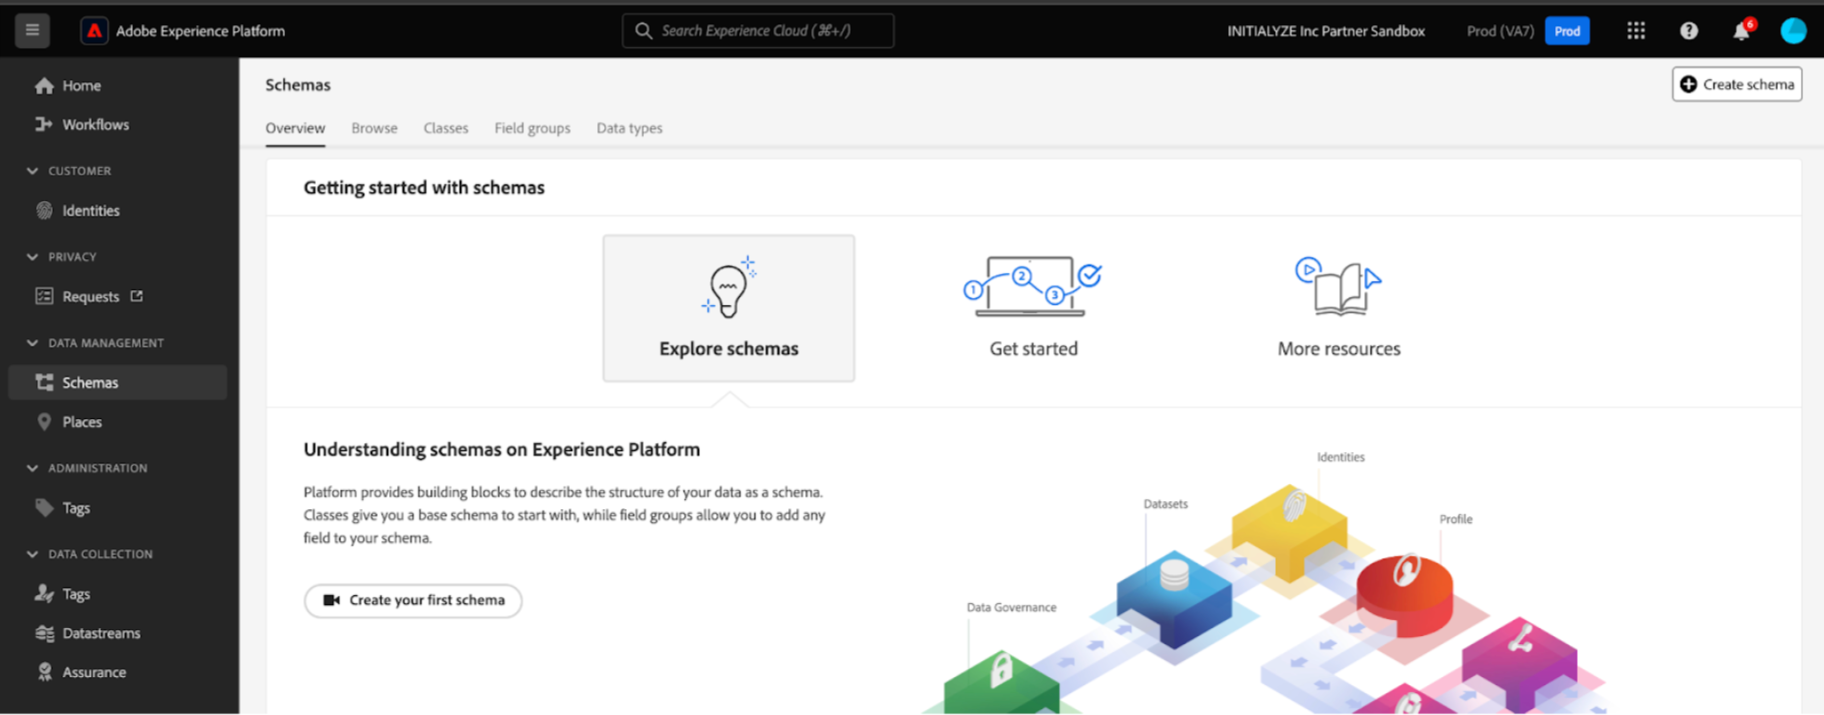
- Head over to schemas on the left navigation and click "Create schema."
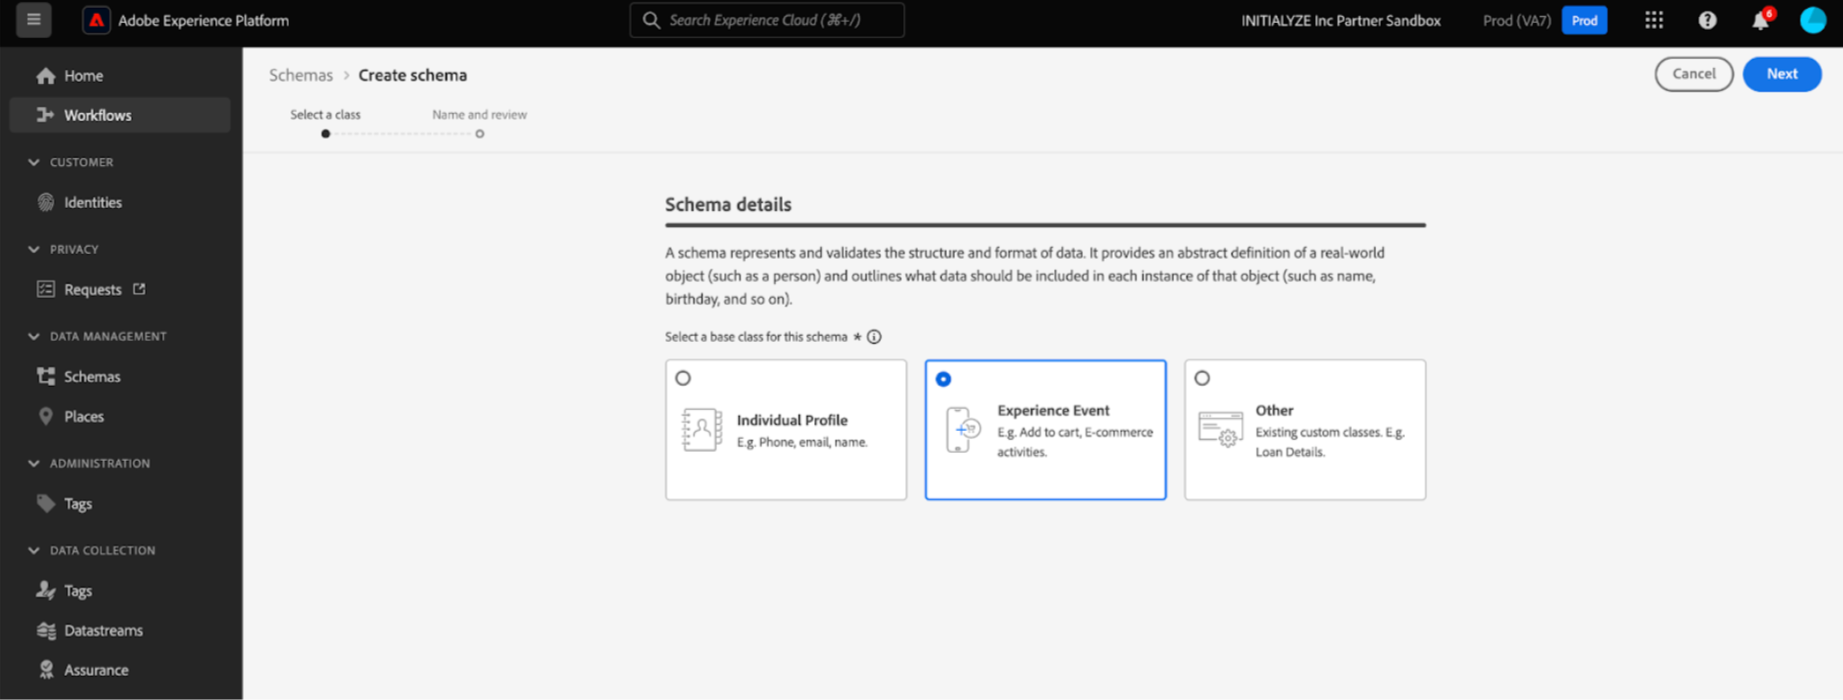
- Choose "Experience Event" as the schema type and give it a descriptive name (think "User Email Capture").
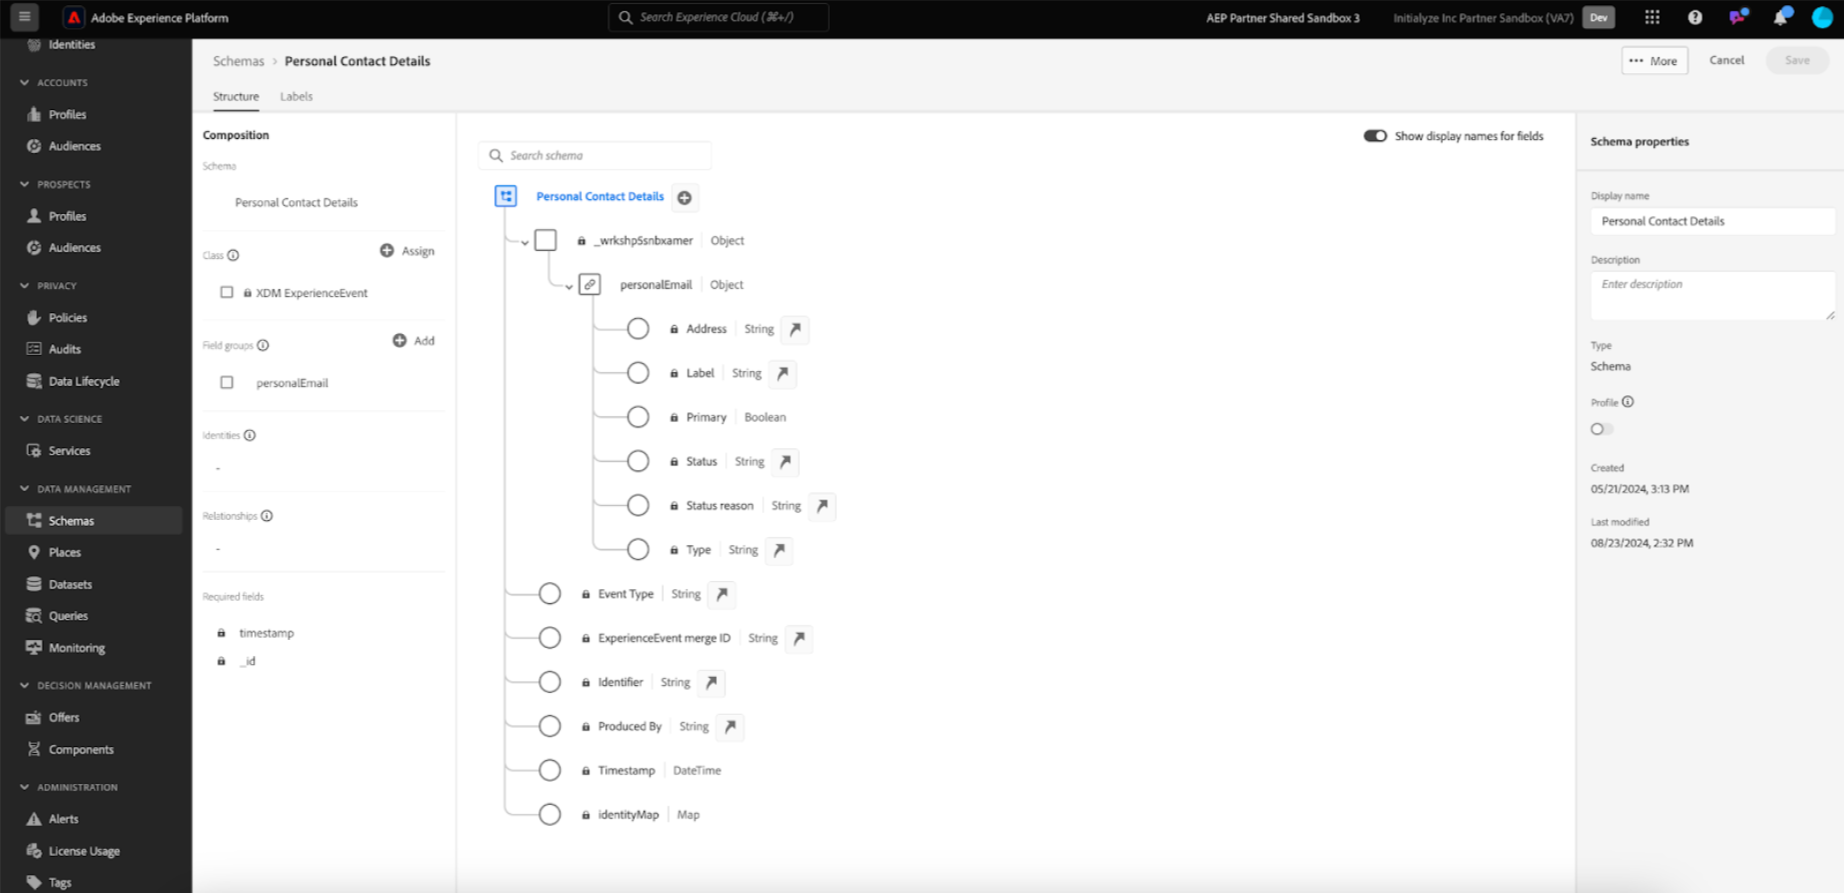
- Include the "Personal Contact Details" field group, and add a new field property Address with personalEmail field group to access the user email field. Don't forget to save your shiny new schema!
Now, let's create a dataset – a container that will hold the actual user email data.
- Navigate to Datasets and click "Create dataset."
- Select "Create dataset from schema" and choose the schema you just created
- Give your dataset a memorable name (e.g., "AEM User Emails").
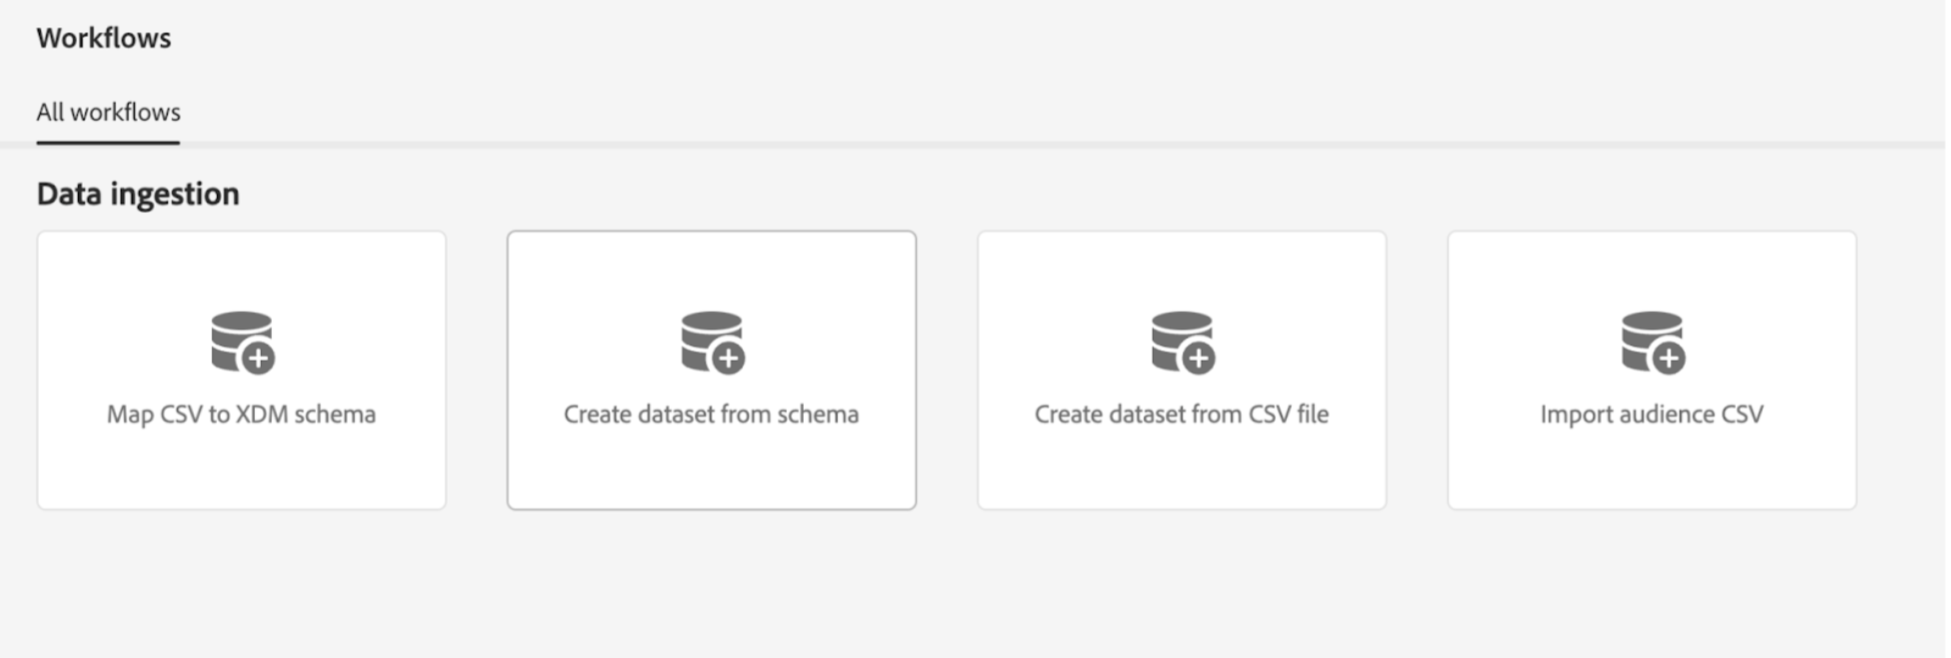

Step 2: Setting Up the Datastream - Configuring data delivery to AEP
Think of a datastream as a dedicated lane on a highway, specifically for your user email data. It tells the Adobe Edge Network exactly where to deliver the data – straight to AEP!
Here's how to configure your datastream:
- Access the AEP Data Collection Interface.
- Navigate to Datastreams on the left navigation and click "New Datastream."
- Give your datastream a name and select the same sandbox you used earlier.
- Click "Add Service" and choose "Adobe Experience Platform" as the service.
- Hit save to solidify your datastream configuration.
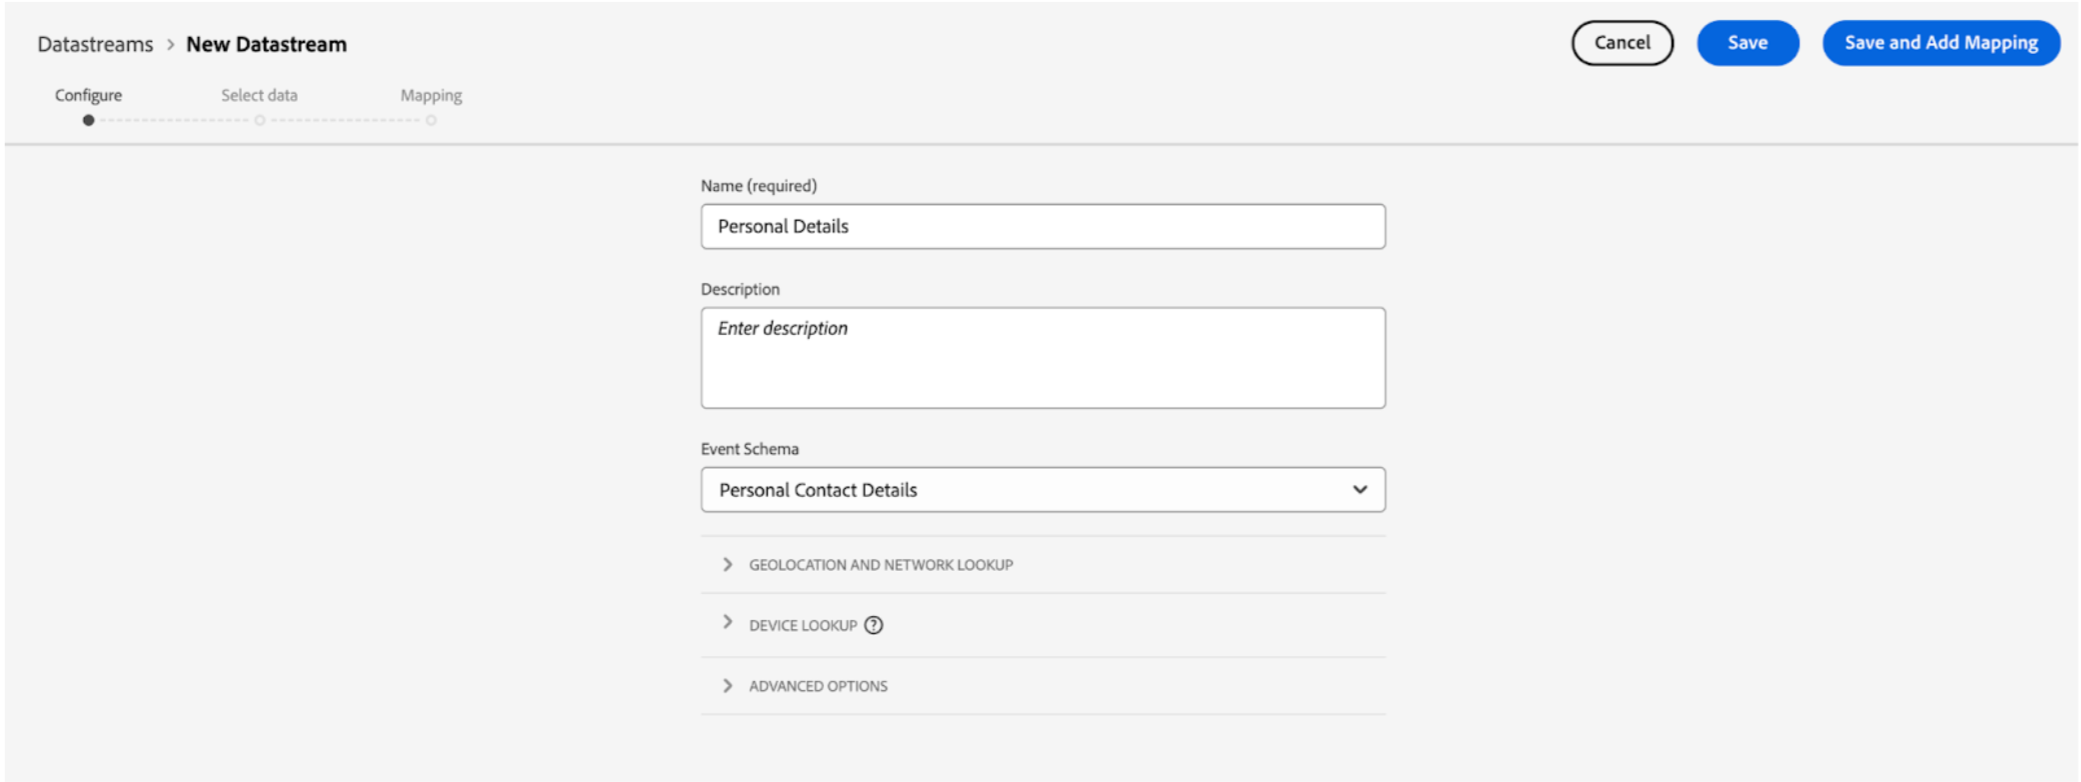
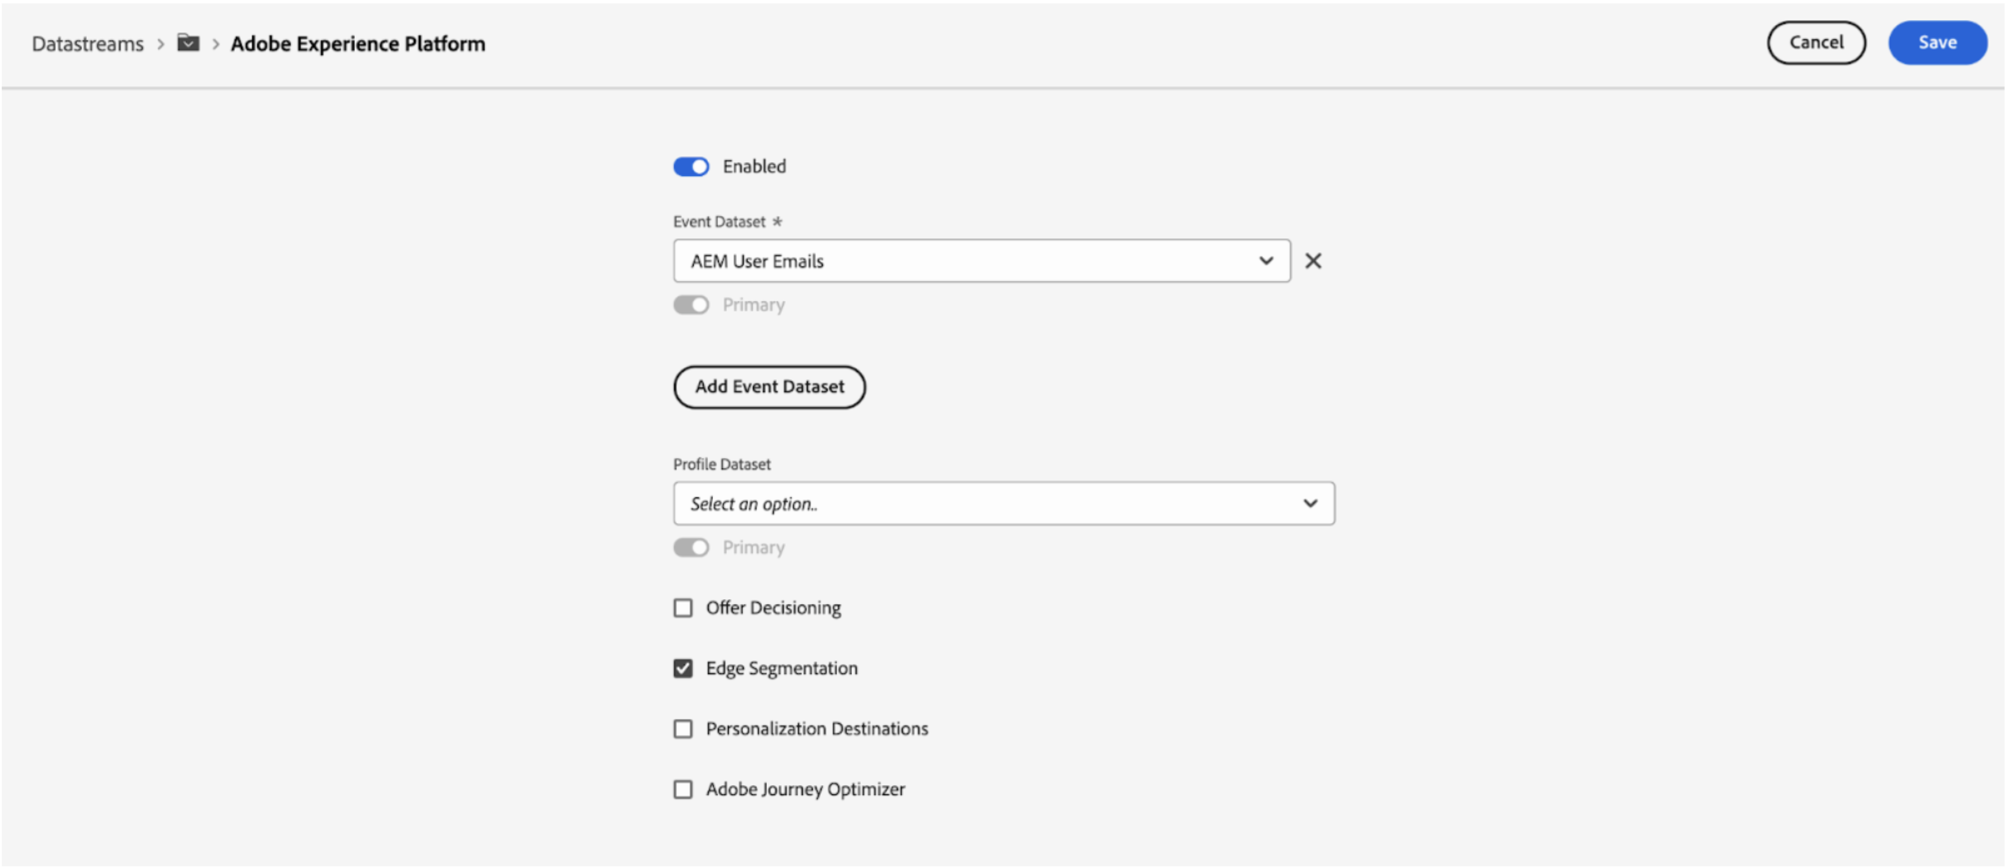
Step 3: Building the bridge - Configuring tag properties
The tag property acts like a bridge, connecting AEP Data Collection with your AEM pages. It provides a JavaScript library containing the rules for collecting user email data.
Let's build this bridge:
- Head over to Tags and click "New Property" on the right.
- Give your tag property a name and include your web domain. Save it for future reference.
- Find your newly created tag property in the list and open it.
- Under "Extension" (left rail), ensure "Core Extension" is available.
- Time to add the "AEP Web SDK" extension. Search for "web sdk" in the "Catalog Tab," select the extension, and click "Install."
- While installing, specify the same sandbox and datastream you used earlier for all environments. Save the changes.

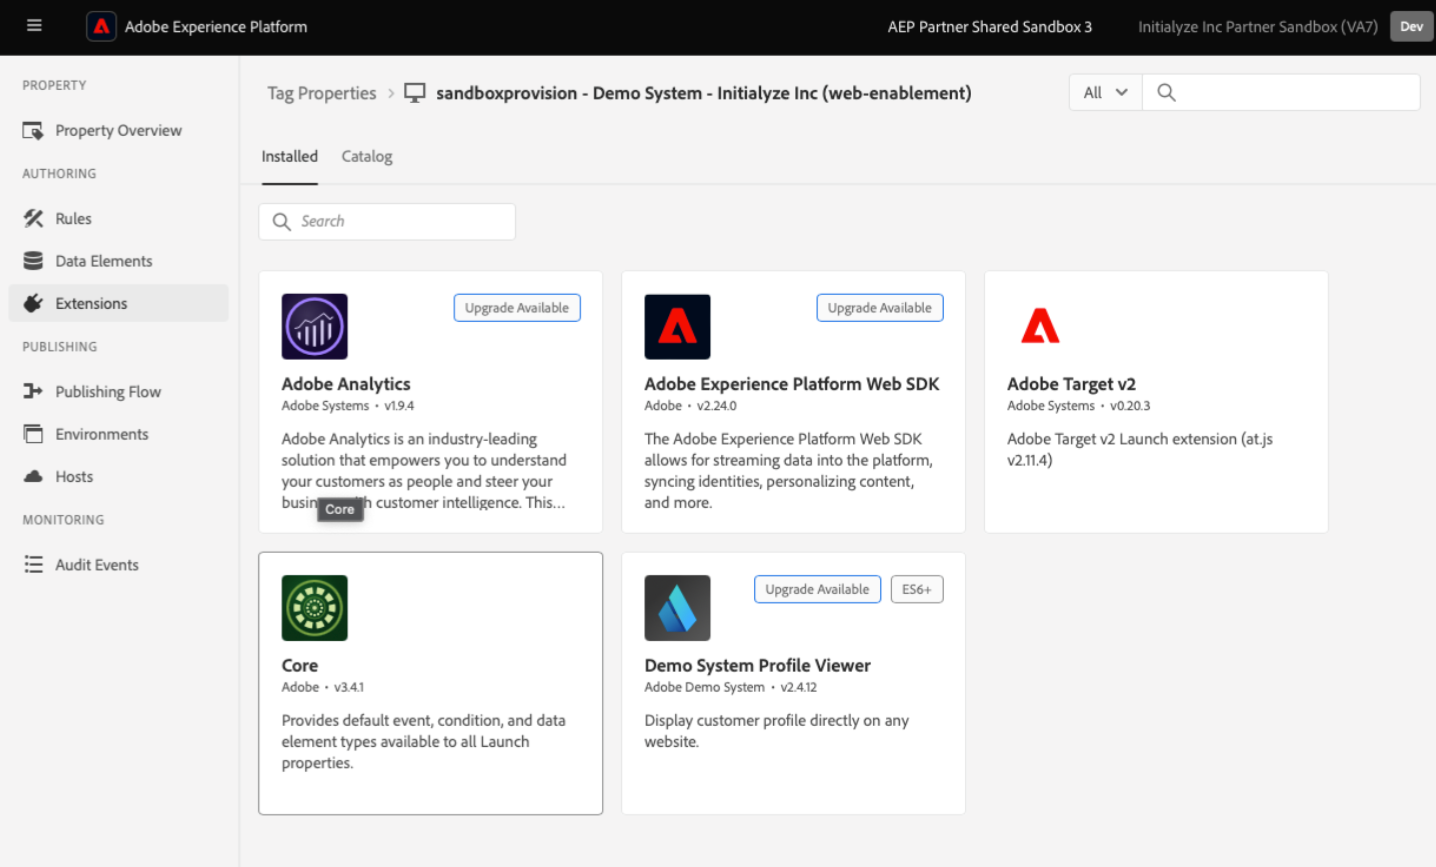

Now, we'll define a rule that tells the tag property when to collect user email data:
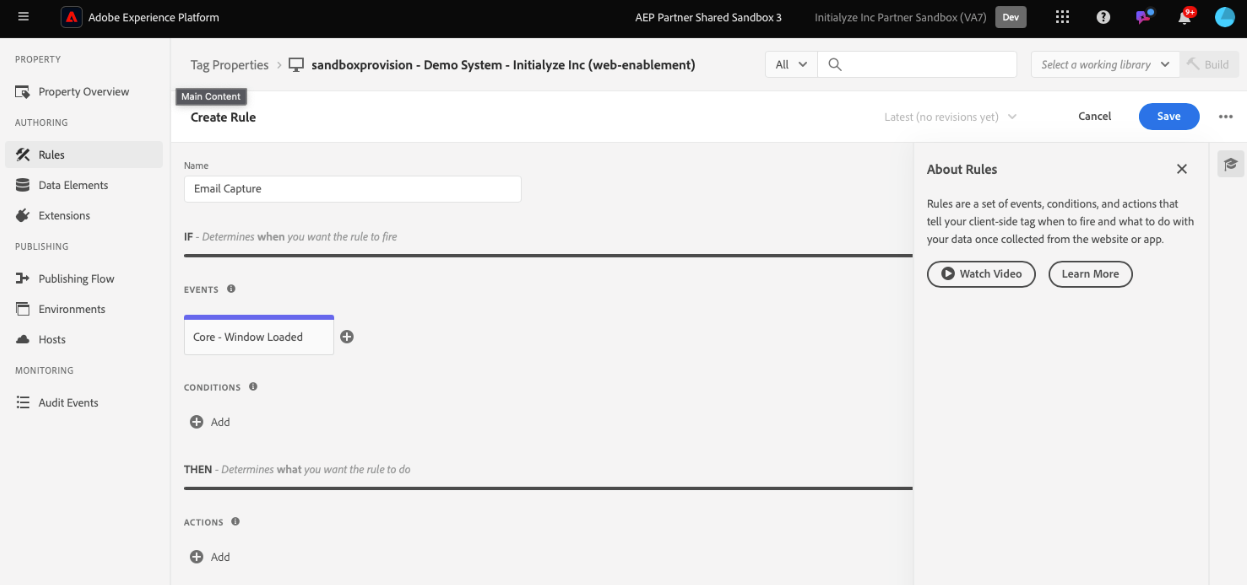
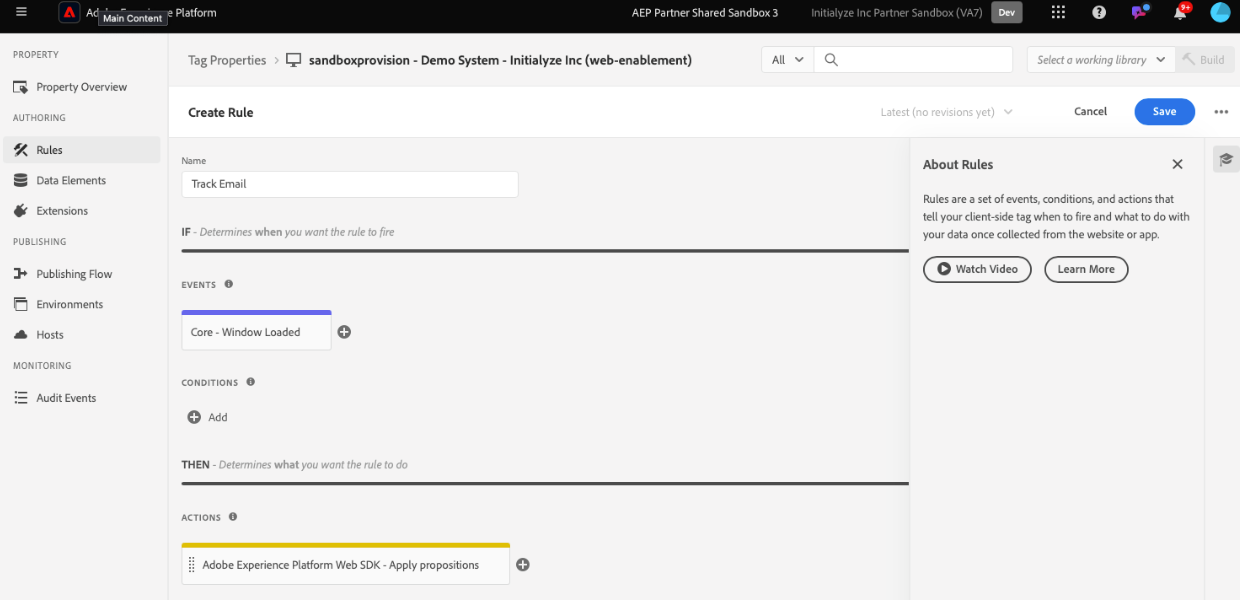
- Under "Rules" click "Create New Rule" and give it a name.
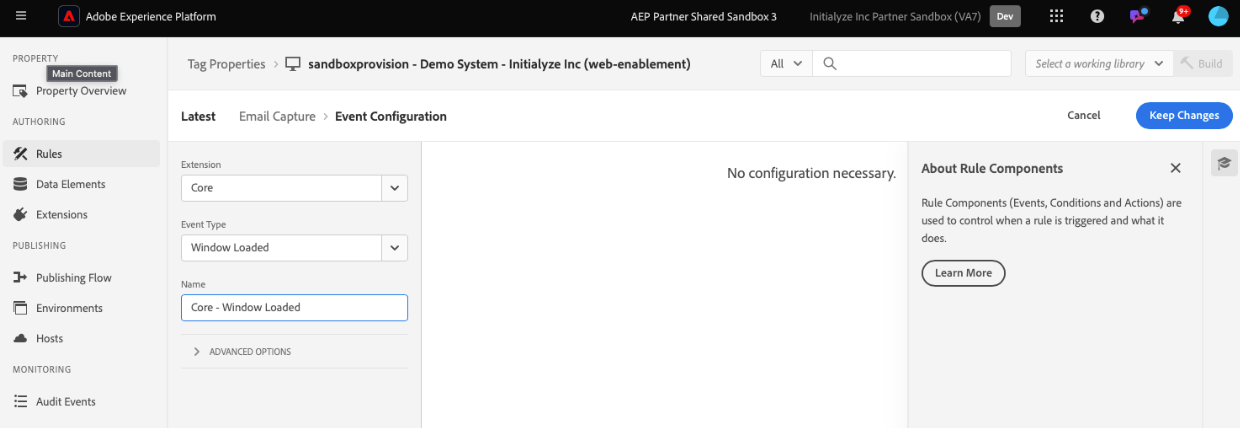
- Click "Add" below "Events" and select "Core" as the extension and "Window Loaded" as the event type. This means the rule will fire whenever a user opens a page on your website. Save the changes.
- No need for extra steps if you want the rule to fire on all pages. Now, let's define what data to collect:
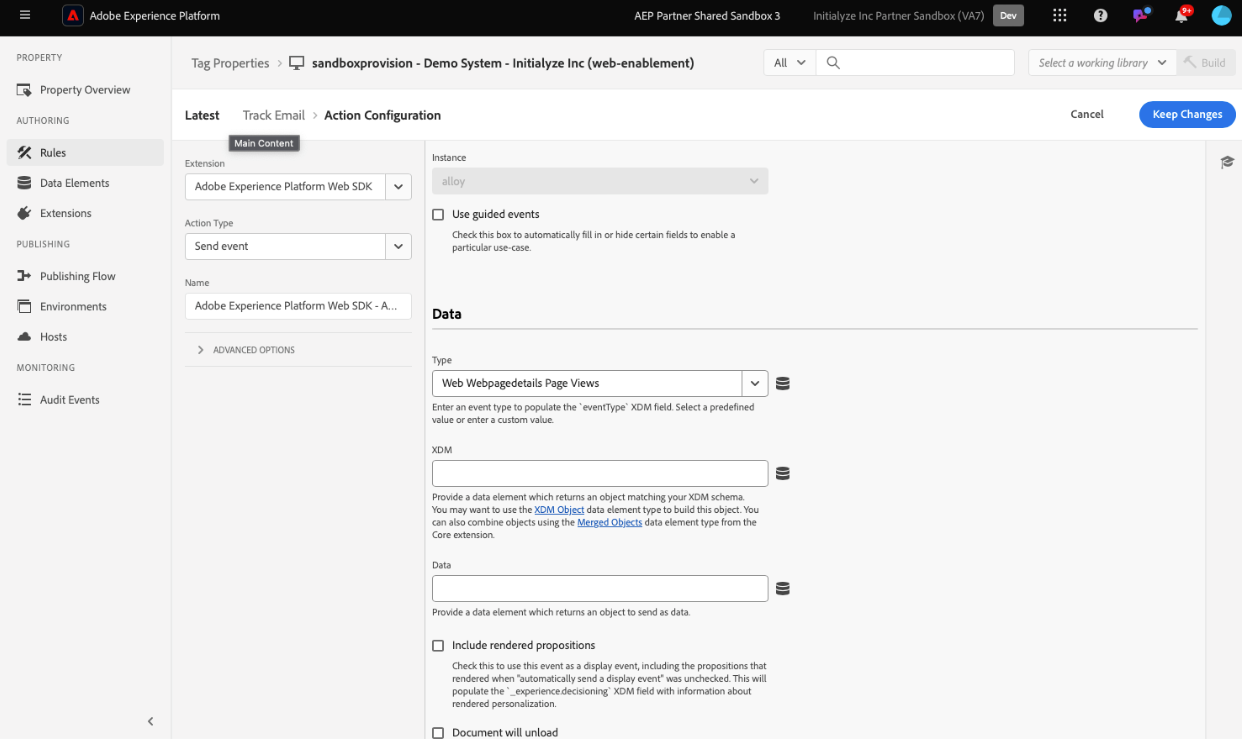
- Click "Add" below "Actions" and choose "Adobe Experience Platform Web SDK" under extension. Select "Sent Event" as the action type.
- Under "Type" on the right side, choose "Web Webpagedetails Page Views''. This sends basic web page information along with the user email data. Save the rule.
We've built the bridge, but there's still a gap. We need a way to get the user email address from AEM to the bridge.
Step 4: Creating Data Elements
Data elements act like buckets that hold the data we want to send. Here, we will create two data elements:
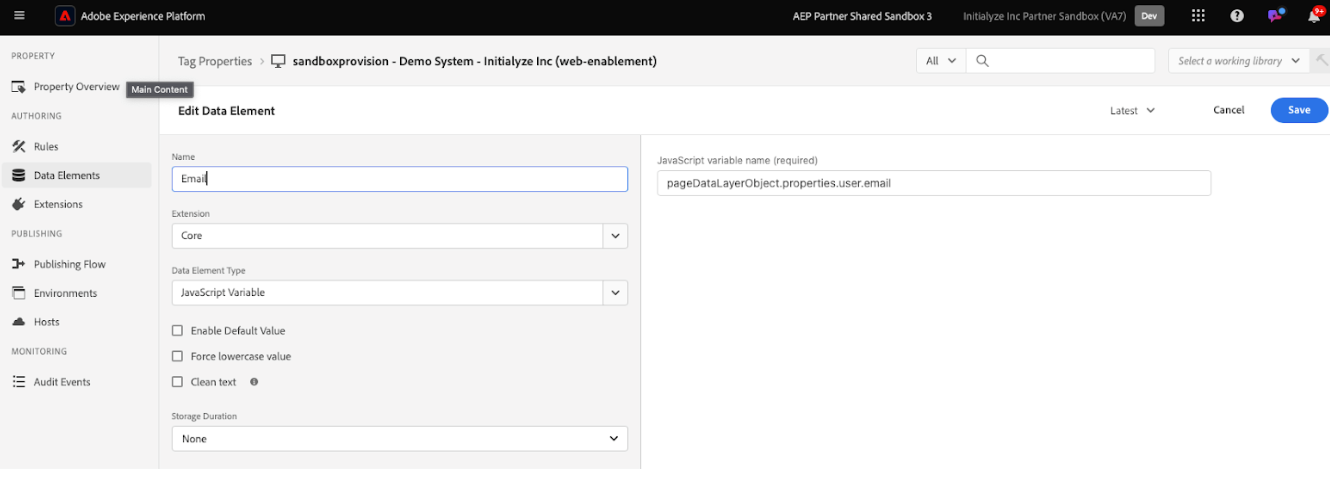
- User Email: Go to "Data Elements'' and click "Create New Data Element". Name it (e.g., Email) and select "Core" under extension and "Java Script Variable" as the data element type. Assuming a datalayer object named "pageDataLayerObject'' exists (yours might differ), provide the script to access the email like this: pageDataLayerObject.properties.user.email. Save the changes.
- XDM Object: Create another data element named "XDM Object" by selecting "Adobe Experience Platform Web SDK" under extension and "XDM Object" as the data element type. Choose the sandbox and schema you created earlier (“Personal Contact Details”). Navigate to "personalEmail" > "address." For the address field value, select the data element capturing the user email address (the one you just named "Email"). Save the changes.

Step 5: Mapping Data and Sending Events to AEP
Now, the "XDM Object" data element holds the user email data in the AEP schema format. Let's send it to AEP!
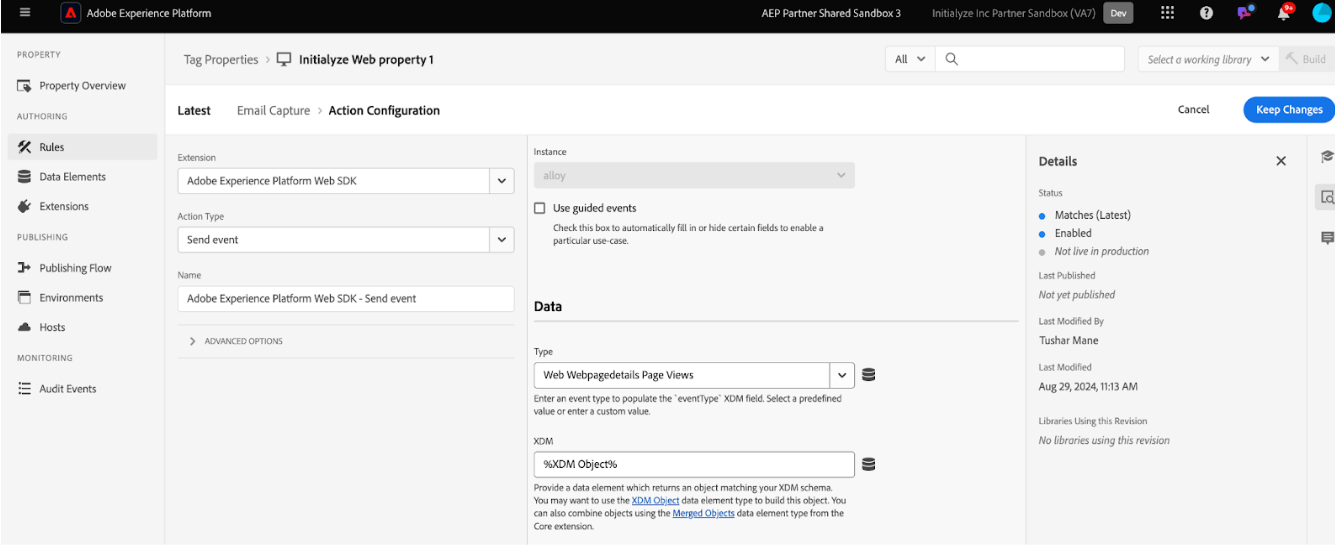
- In "Rules," open the rule you created and click the "send event" action.
- Map the "XDM Object" data element to the corresponding XDM field (in this case, "personalEmail" > "address"). Save the changes.
Step 6: Don't Forget to Build!
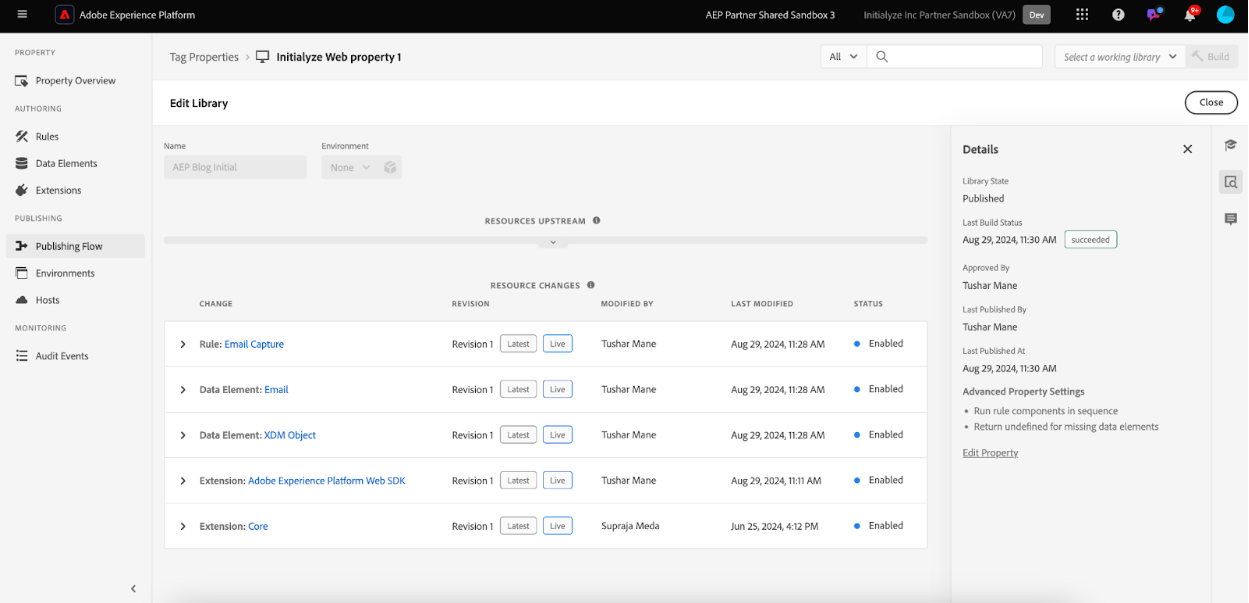
Remember, whenever you make changes to the rule, you need to rebuild it for the changes to take effect.
- In the top section, select the library you created earlier or create a new library with any name Environment Development, and add resources which are updated.
- Click the "Save to Library" dropdown and choose "Save to Library and Build."
Step 7: Embedding the Bridge - Unleashing the Data Flow
The tag property, our bridge, is a JavaScript library that needs to be embedded on your AEM page to collect user email data.

- Go to Environments. In the Development Environment, select the option in the "Install" column. You'll find the JS library there.
- Copy the JS library code and embed it inside the tag of your AEM page.
Step 8: Testing your setup
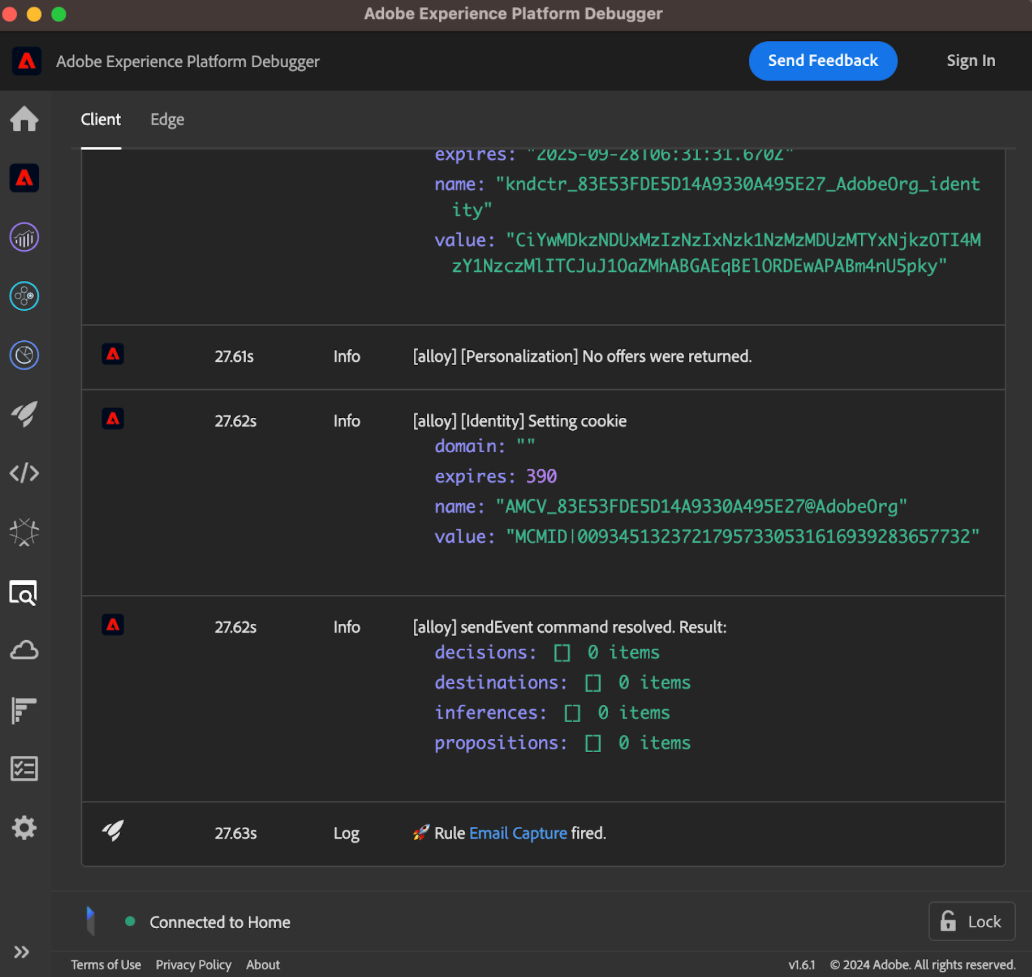
We can leverage the Adobe Experience Platform Debugger to validate if the data is being sent correctly. Here's a quick guide:
- Install the Debugger extension and sign in.
- Open the debugger and the AEM page you want to test.
- In the debugger, navigate to "Experience Platform Tags" and switch to the "Configuration" tab.
- Click "Add new embed code" under "Injected Embed Codes."
- Select the created tag property from the dropdown and choose "Development" in the environment. Click "Apply."
Step 9: Confirming data arrival!
With the library embedded and the debugger confirming data flow, user email data should be making its way to AEP. Allow up to 15 minutes for the data to appear.
- Go to Datasets in AEP and open the dataset you created ("AEM User Emails"). You should see the data populated!
- Click "Preview dataset" to see a sample of the ingested data.
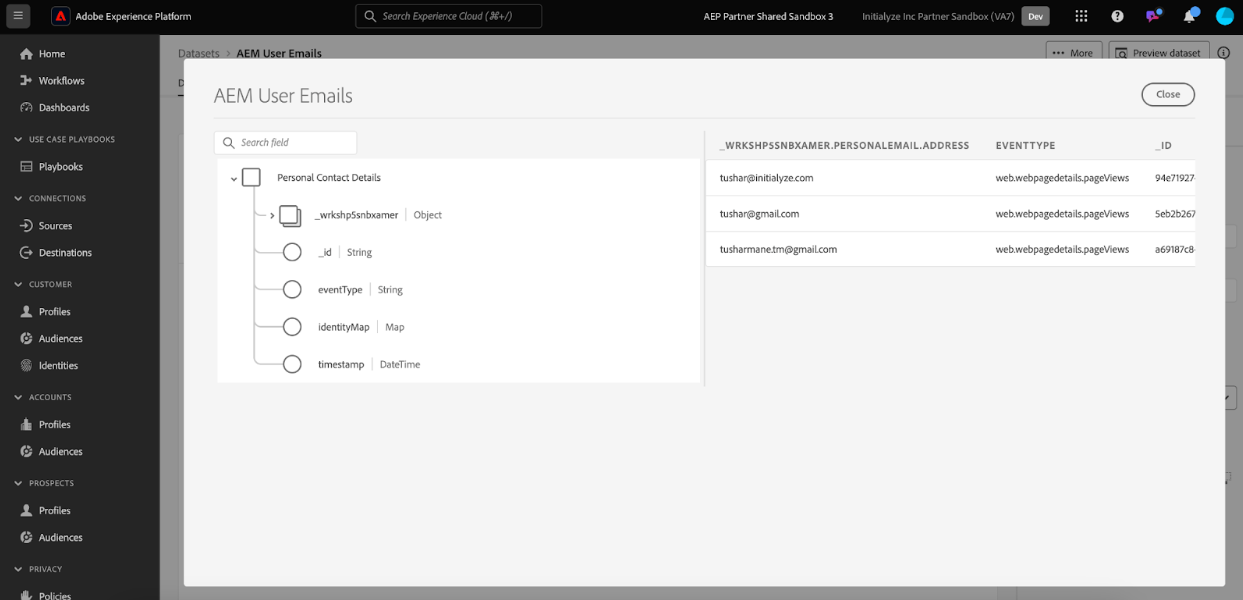
Congratulations! You've successfully transferred user email data from AEM to AEP, unlocking a treasure trove of user insights. With this real-time data at your fingertips, you can personalize user experiences, optimize marketing campaigns, and ultimately, drive business growth.
Conclusion:
By configuring the Adobe Web SDK to transfer user data from AEM to AEP, you’ve unlocked the potential for real-time user insights that can drive personalized experiences and business growth. With this setup, your marketing campaigns will become more targeted, and your users will receive tailored experiences that keep them engaged. As you continue to refine your strategies, this seamless data transfer process will become a crucial asset in your digital transformation journey.
If you need any assistance with AEM or AEP, or if you require help with any other Adobe Experience Cloud solutions, feel free to reach out to us. We're here to support you every step of the way.
